jmeter:jmeter_on_vnc
VNC経由でJMeter
Install
# yum groupinstall -y "X Window System"
<del># yum install -y vnc vnc-server</del>
# yum install -y tigervnc-server
# yum install -y java
# wget http://archive.apache.org/dist/jakarta/jmeter/binaries/jakarta-jmeter-2.4.tgz
# tar zxvf jakarta-jmeter-2.4.tgz
archive.apache.org ( jmeter doenload )
CentOS6.xでは以下も必要
# yum install -y twm
# yum install -y xterm
# yum groupinstall -y "Japanese Support"
起動
# vncserver :1

You will require a password to access your desktops.

Password:
Verify:
xauth:  creating new authority file /root/.Xauthority
xauth: (stdin):1:  bad display name "jmeter8g:1" in "add" command

New 'jmeter8g:1 (root)' desktop is jmeter8g:1

Creating default startup script /root/.vnc/xstartup
Starting applications specified in /root/.vnc/xstartup
Log file is /root/.vnc/jmeter8g:1.log

# ps aux | grep vnc
root      2722  0.0  0.0  40920  4876 pts/0    S    14:03   0:00 Xvnc :1 -desktop jmeter8g:1 (root) -httpd /usr/share/vnc/classes -auth /root/.Xauthority -geometry 1024x768 -depth 16 -rfbwait 30000 -rfbauth /root/.vnc/passwd -rfbport 5901 -pn
root      2735  0.0  0.0  33556  1732 pts/0    S    14:03   0:00 vncconfig -iconic
root      2831  0.0  0.0  65448   836 pts/0    S+   14:04   0:00 grep vnc
# ifconfig
eth0      Link encap:Ethernet  HWaddr 66:4F:CA:EE:C7:02
          inet addr:10.100.1.55  Bcast:10.204.1.255  Mask:255.255.255.0
          UP BROADCAST RUNNING MULTICAST  MTU:1500  Metric:1
          RX packets:286340 errors:0 dropped:0 overruns:0 frame:0
          TX packets:145452 errors:0 dropped:0 overruns:0 carrier:0
          collisions:0 txqueuelen:1000
          RX bytes:212141504 (202.3 MiB)  TX bytes:22510169 (21.4 MiB)

lo        Link encap:Local Loopback
          inet addr:127.0.0.1  Mask:255.0.0.0
          UP LOOPBACK RUNNING  MTU:16436  Metric:1
          RX packets:80 errors:0 dropped:0 overruns:0 frame:0
          TX packets:80 errors:0 dropped:0 overruns:0 carrier:0
          collisions:0 txqueuelen:0
          RX bytes:12551 (12.2 KiB)  TX bytes:12551 (12.2 KiB)
PuTTYのSSHトンネル経由でVNCに接続
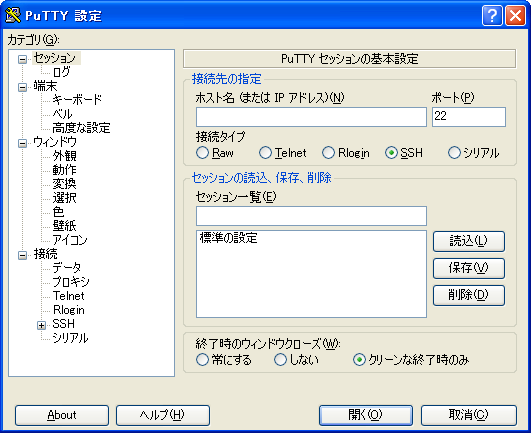
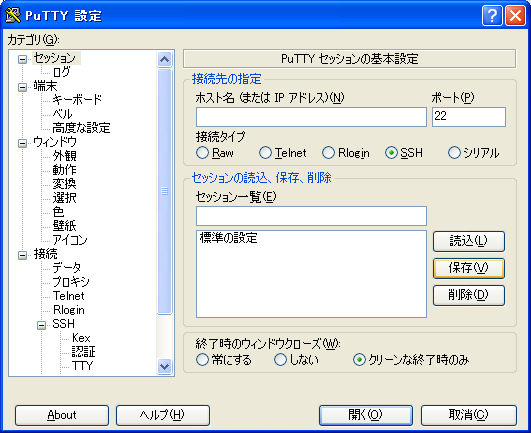
- ホスト名、ポートなど、通常のPuTTYの設定を行う
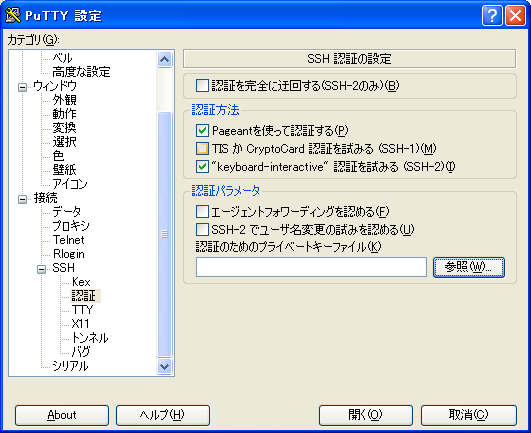
- 公開鍵認証なので、鍵を設定する
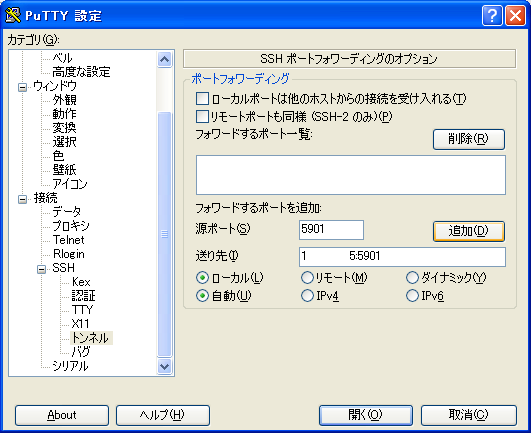
- トンネルの設定を行う
- 源ポート:5901
- 送り先:サーバのIPアドレス:5901
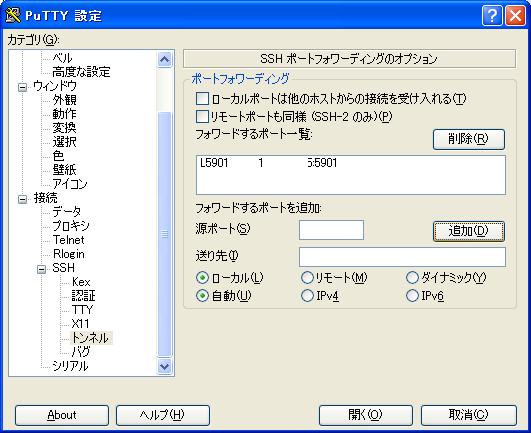
- [追加]を押下して反映されたことを確認
- セッションに戻って、「セッション一覧」に保存する名称を入力、[保存]押下
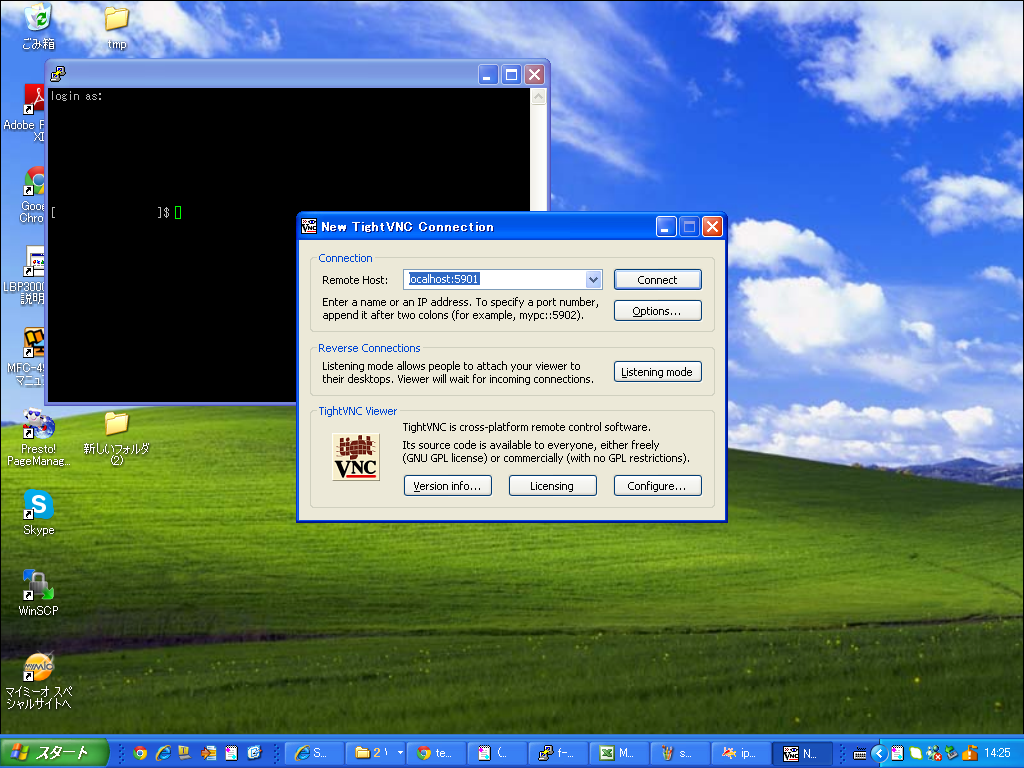
- PuTTYで対象サーバに接続してる状態で、TightVNCを起動
- Remote Host:localhost:5901
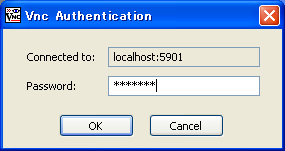
- パスワード要求のウィンドウでパスワードを入力して[OK]押下
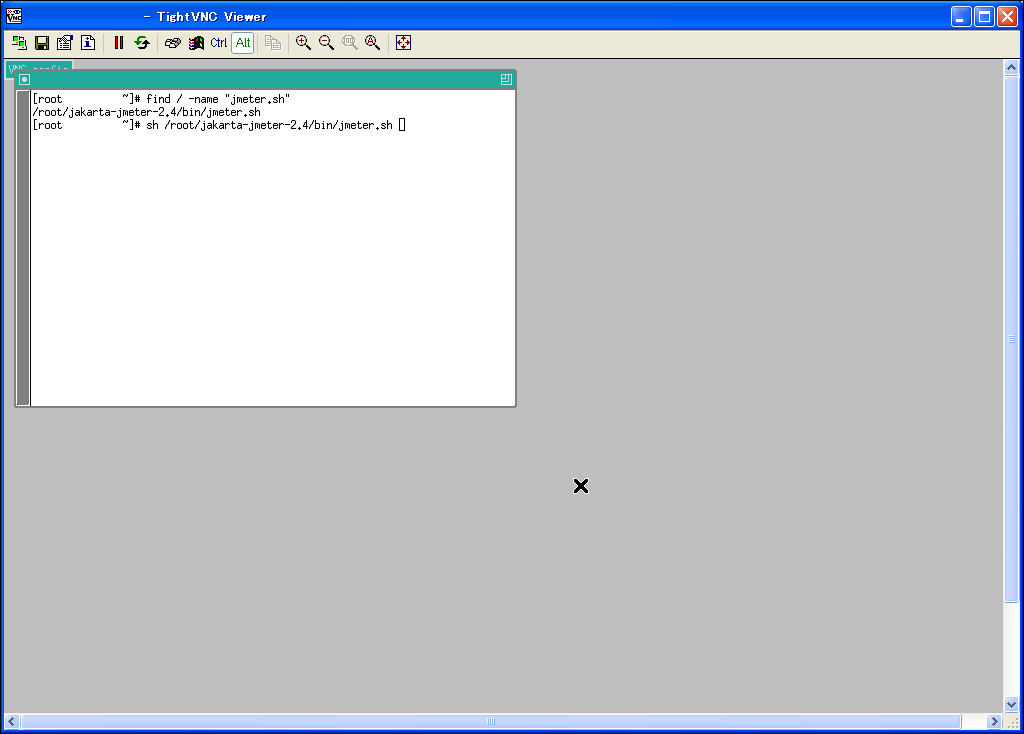
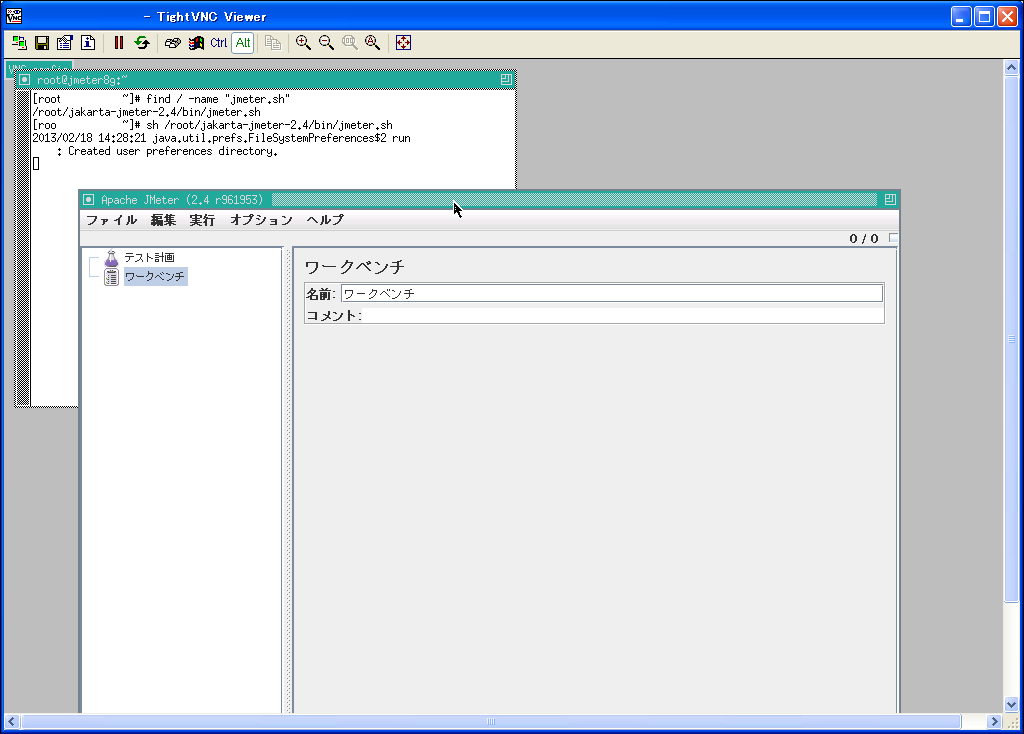
- X Window(Linuxのデスクトップ)が表示されたら、解凍済みのjmeter/bin配下のjmeter.shを実行
# find / -name "jmeter.sh"
/root/jakarta-jmeter-2.4/bin/jmeter.sh
# sh /root/jakarta-jmeter-2.4/bin/jmeter.sh
2013/02/18 14:28:21 java.util.prefs.FileSystemPreferences$2 run
  : Created user preferences directory.
- JMeterが起動する
vncserver 終了
$ ps aux | grep vnc
f-user   26772  0.1  0.0  40920  4876 pts/0    S    14:48   0:00 Xvnc :1 -desktop jmeter16:1 (f-user) -httpd /usr/share/vnc/classes -auth /home/f-user/.Xauthority -geometry 1024x768 -depth 16 -rfbwait 30000 -rfbauth /home/f-user/.vnc/passwd -rfbport 5901 -pn
f-user   26781  0.0  0.0  33556  1732 pts/0    S    14:48   0:00 vncconfig -iconic
f-user   26809  0.0  0.0  65448   840 pts/0    S+   14:48   0:00 grep vnc
$ vncserver -kill :1
Killing Xvnc process ID 26772
jmeter/jmeter_on_vnc.txt · 最終更新: 2015/11/11 04:56 by clownclown

